
Decibel makes it easy to setup your digital audio campaign. It’s a simple 6 step process that can be as fast as 5 minutes to get started. Designed to have all the features seasoned media buyers expect while also be approachable for the non marketer Decibel can be as quick or as complex as you desire.
To get started login to app.decibelads.com from a desktop computer.
Next click “New Digital Audio Campaign” in the top left hand sidebar.
As you’ll see in the left hand side bar there are 6 steps to creating a digital audio campaign with Decibel.
- Campaign details
- Inventory
- Audio ad
- Banner
- Budget
- Review
High level you can think of these steps in the following ways.
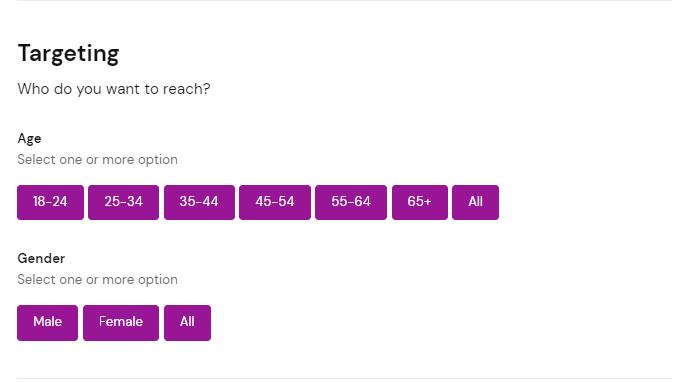
Campaign details = Targeting your ads.
Inventory = What apps / sites / devices your ad will run on.
Audio ad = Upload or create your audio ad or ads.
Banners = Add your companion banner (required) and your conversion banners (optional but encouraged)
Budget = How much you want to spend and set your conversion goals.
Review = Make sure everything looks right, complete your advertiser profile for approval, and add your payment info.
2 important things to note before we get started.
First, in the top right hand corner there is a button titles “Save and Exit” which is pictured below. At any point you can click this and it will save a draft of your campaign.

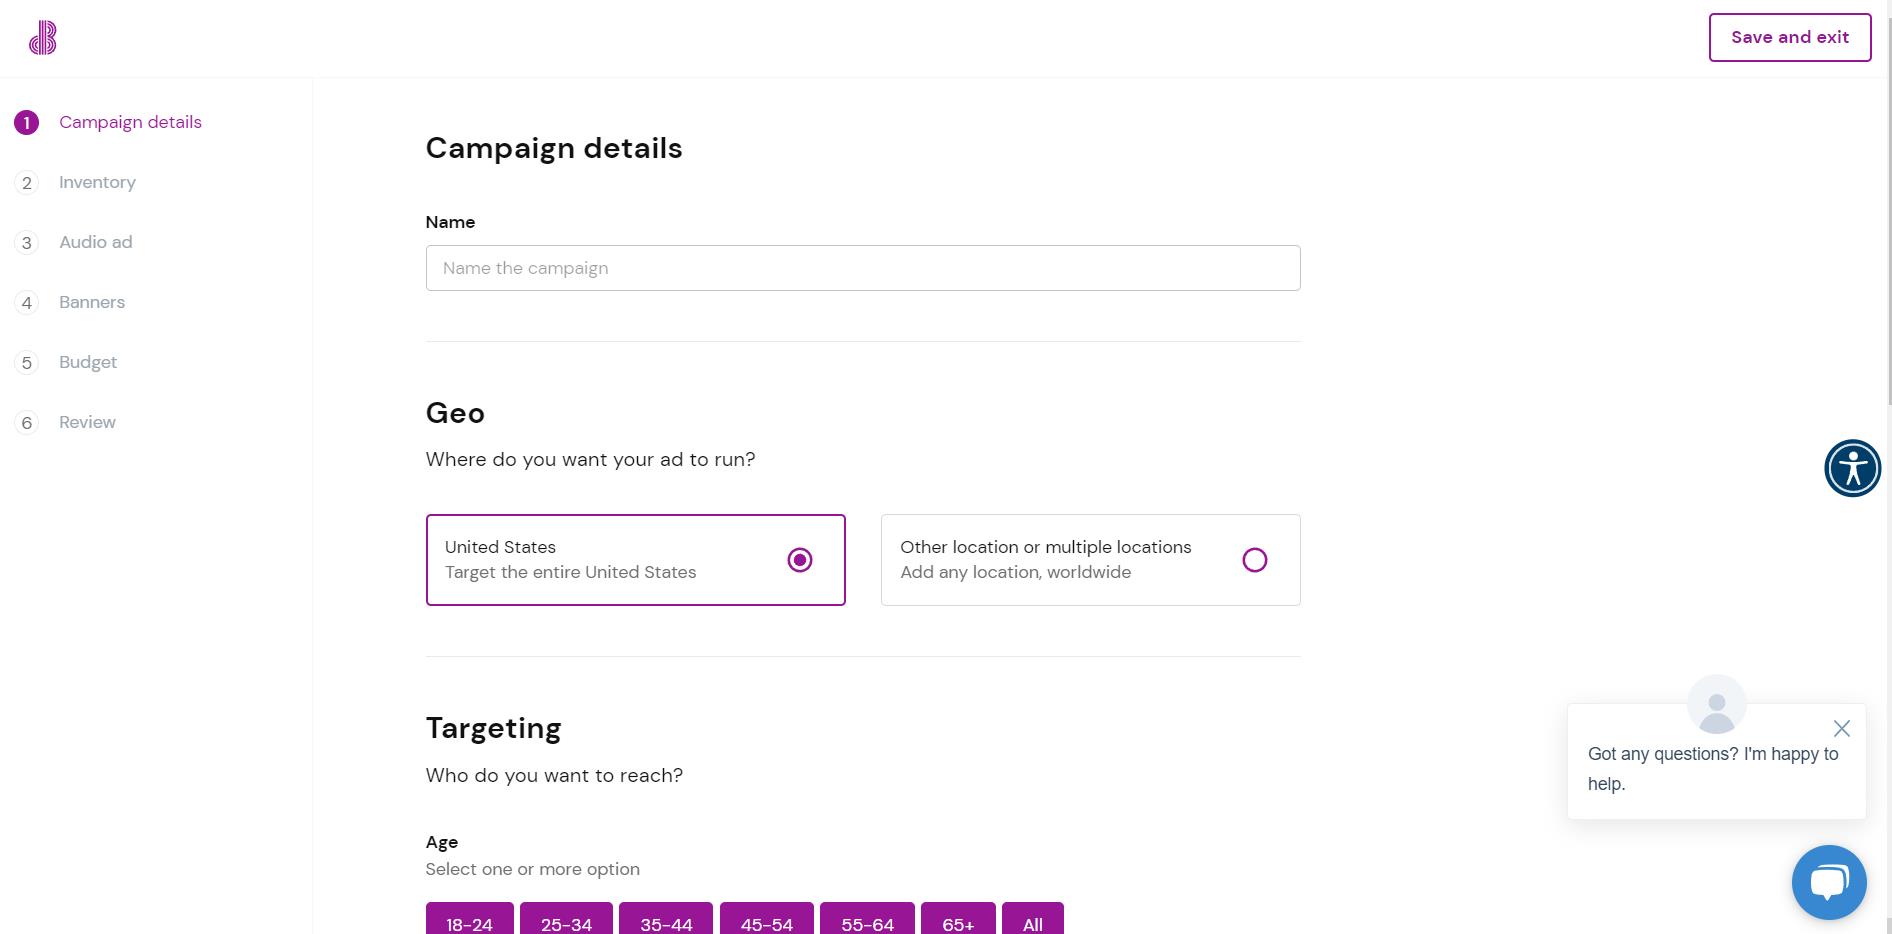
Step 1: Campaign Details
Under campaign details we find the following options:
Name: Name your campaign something easy to remember and sort in your account.
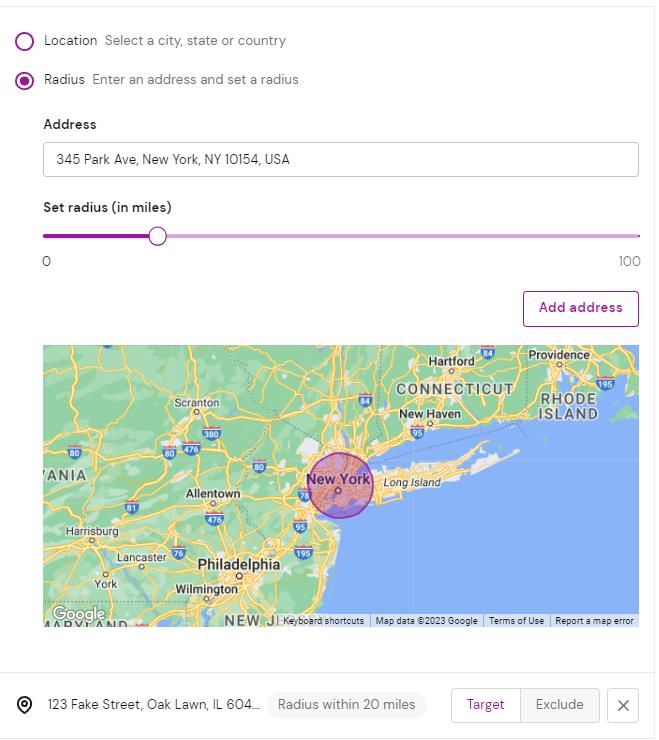
Geo: Choose the geographic targeting for your campaign. By default it is set to the entire United States. While there are many strategic advantaged and disadvantages to utilizing different geographic strategies we typically recommend for testing purposes to only target a single mid sized city for your first campaign. This typically drives the best results as it drives a higher frequency and requires a smaller budget to achieve this frequency.
This is default / entire United States targeting screen:

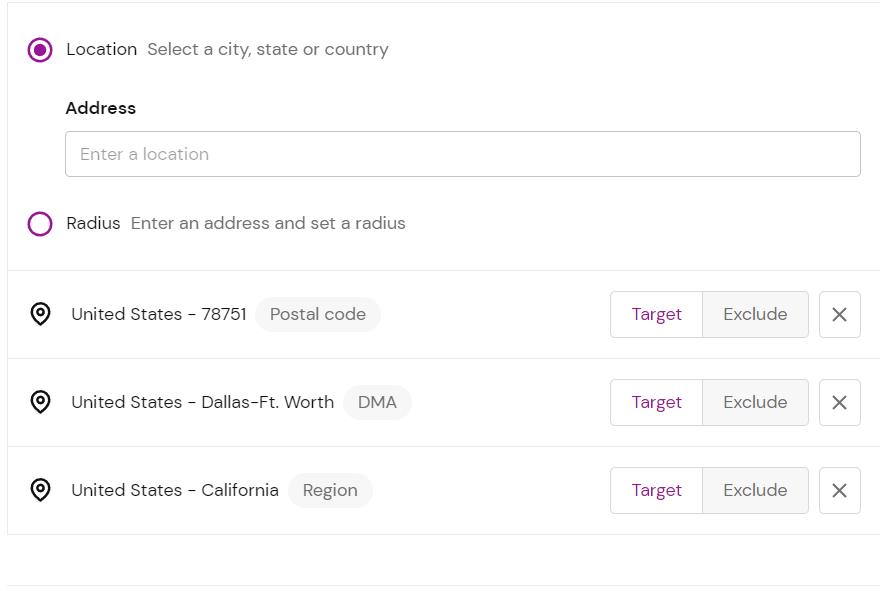
Location targeting options include: DMA regions, Zip codes, states/provinces, and country level targeting. Location targeting includes both targeted and exclude logic. Eg you could target California but exclude San Francisco.
Advanced audiences are optional but highly encouraged. You can browse available fields as well as search for specific keywords to find your exact right target audience. If you are looking for something but don’t see it please don’t hesitate to reach out to support as we are constantly updating our audience list and can likely create a solution for you.

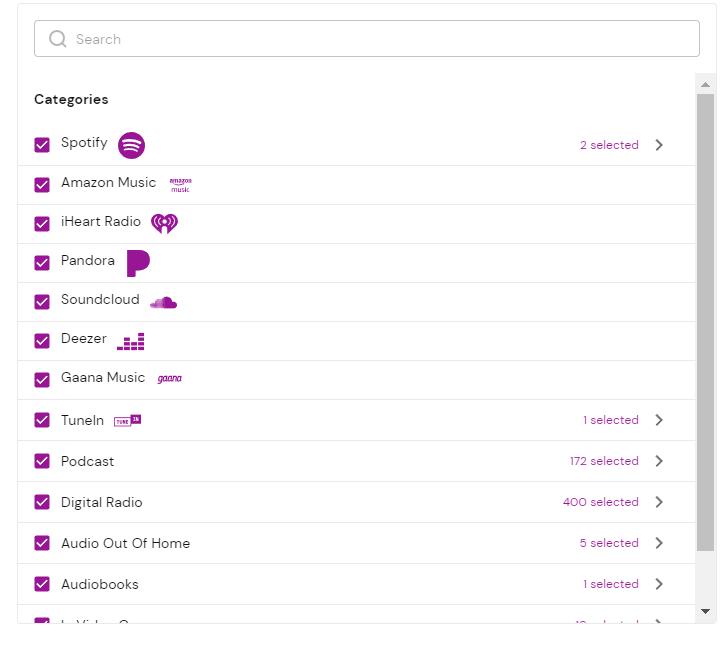
The inventory step is where you can select which publishing partners your ad will run on as well as what device types, operating systems, and bandwidth that the end user has while listening to your ads.
Starting with placement targeting let’s run through the top level options as well as break down individual second level options.
- Spotify
1. Spotify Music (Streaming ad supported music listeners)
2. Spotify Podcasts (Downloaded podcast inventory) - Amazon Music
- iHeart Radio
- Pandora
- Soundcloud
- Deezer
- Gaana Music
- TuneIn
- Podcast (170+ Podcast networks and individual shows. As a note podcast networks may not show the individual show name in your analytics).
- Digital Radio (400+ digital radio stations)
- Audio Out of Home (This is inventory played in businesses such as bars, restaurants, hotels, etc. via bluetooth speakers)
- Audiobooks
- In-Video Game Audio (This is played primarily on mobile downloaded games. The sound will cut to your audio ad and a companion banner will show up on the users screen)
- Aggregated content (This is non transparent inventory available from resellers. This will show up as “Unknown” in your analytics and is deselected by default. For advertiser seeking scale and lower CPMs this is a viable option.)
We’re constantly adding more inventory all the time so this list is frequently updated. Last update was 2/27/23
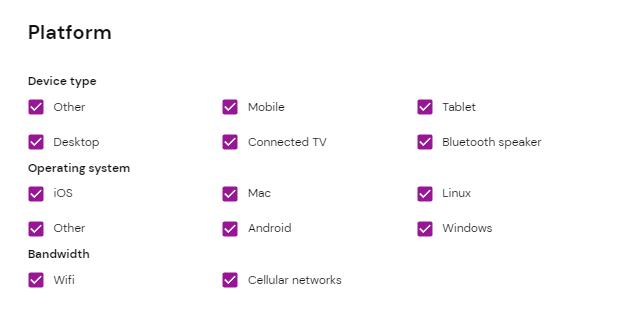
Next is your platform level targeting options. We’re defining platform as the device type, the operating system, and the bandwidth of the device.
Step 3: Audio Ad
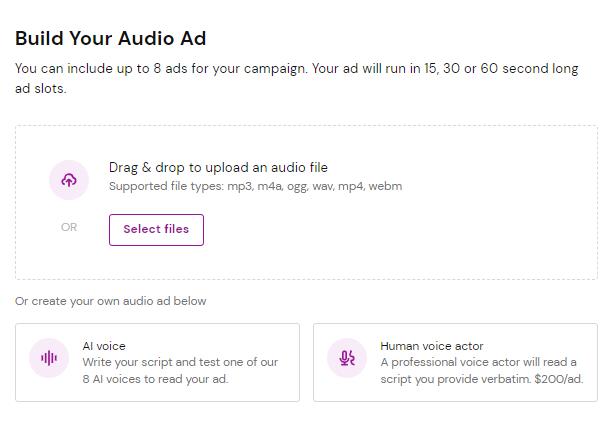
To build your audio ad or ads you have 3 options.
- Upload your audio ad file. We support the following file types and lengths.
mp3, m4a, ogg, wav, mp4, and webm
15 seconds, 30 seconds, and 60 seconds. An ad can be under the exact time, however if the ad is over time. Eg 32 seconds in a 30 second spot, it will cut it off. - AI voice ads
- Human voice actor read ads
AI voice ads are 100% free and instant. Feel free to experiment around to find the exact right voice and script for your campaign.
When you select AI voice ads your screen will look like the following:
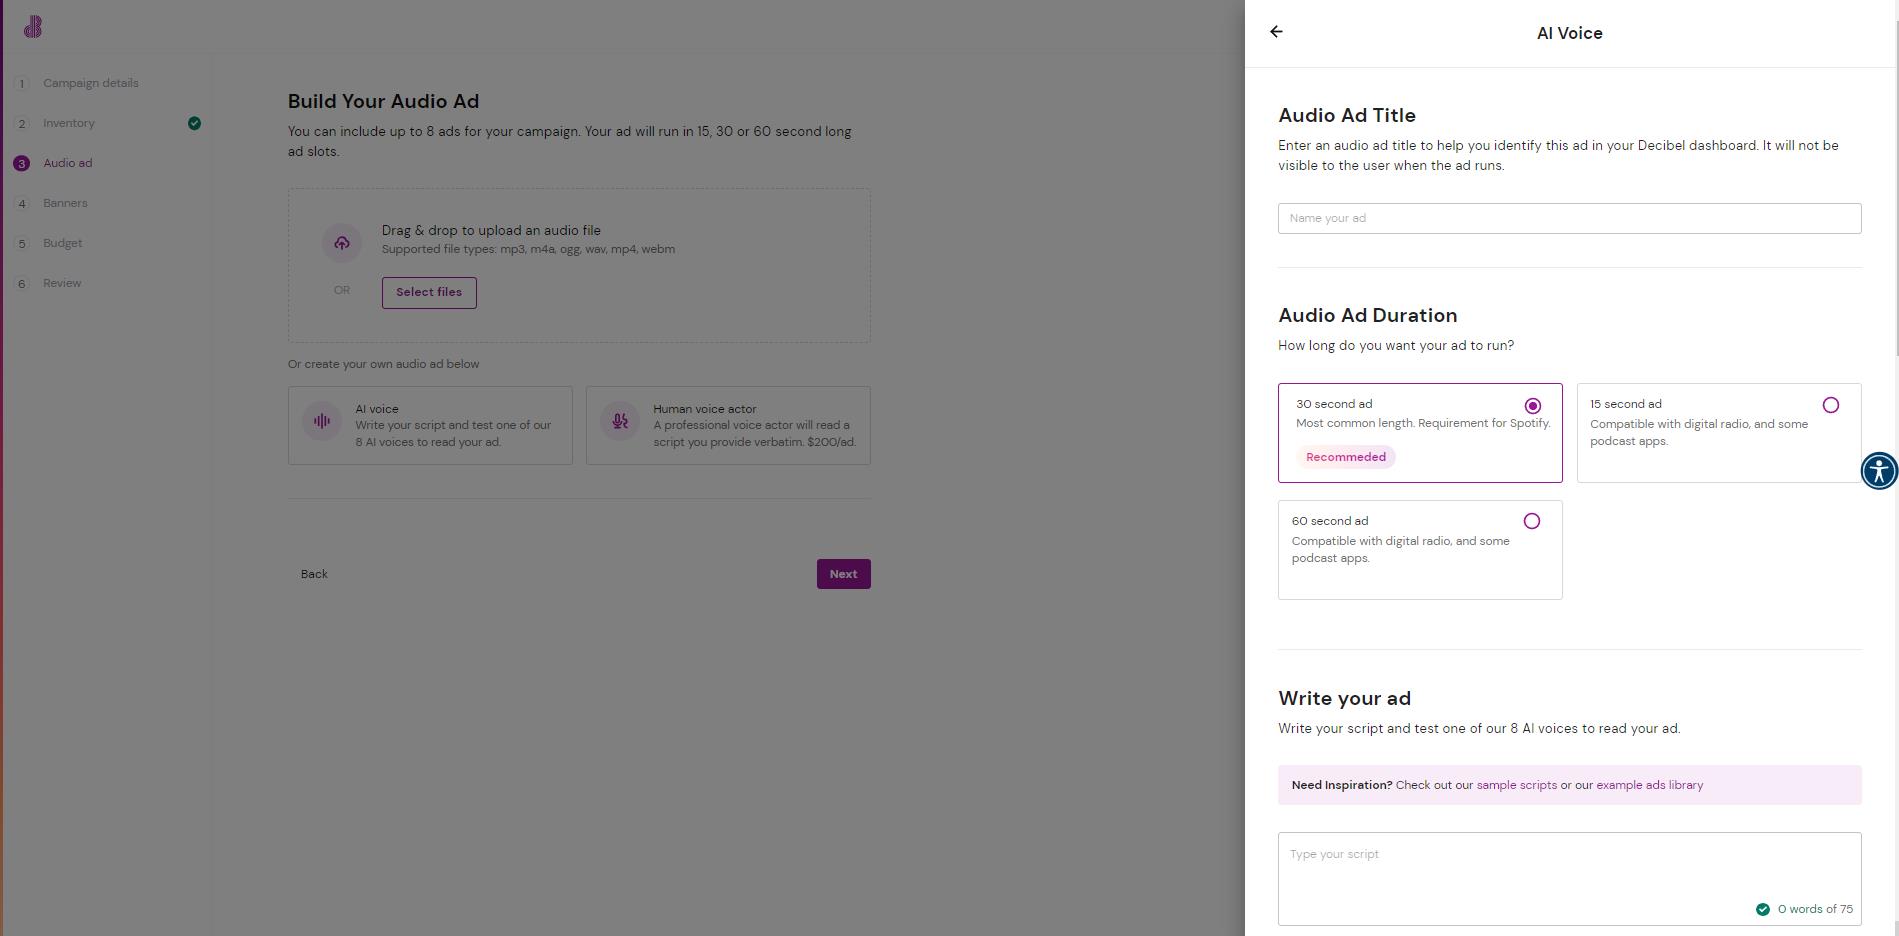
- Name your ad.
- Select your ad duration. Options are 30 seconds (recommended), 15 seconds, and 60 seconds.
- Write your ad. The following scripts lengths roughly match to these ad durations:
30 seconds: 75 words
15 seconds: 35 words
60 seconds: 150 words - Write your ad script. We have a robust example ad library and quick start guide you can use to help you craft an audio ad that drives results.
- Select your AI voice. You can preview them in the platform or here.
- Add some background music. We have a number of options and you can preview them before you select.
- Lastly you can preview what your ad will sound like by hitting the button shown below. If you make any updates you can preview the changes again.
Human voice actors
We have a robust amount of options available for human voice actors with a number of different accent, age, and gender options to make sure you’re utilizing the voice actor that is best for your campaign. The flow of the human voice actor ad creation is very similar to that of AI voices with some important differences.
When you create a human voice ad the process is a little different in that it’s not instant gratification. When you submit your campaign you will get an email within 24 hours with a link to listen to your ad. If you approve the ad just reply to this email with “Approve” and your campaign will start right away. If you require revisions you can email us back with your thoughts and we’ll make to make it the ad you’re looking for.
Human voice actor ads cost $200 per ad. These come with unlimited revisions. However, with those revisions, you cannot change the actual voice that is used. They can re-record the ad though if they mispronounced a word, we can change the music selection etc. At this time we do not support custom sound effects or multiple voices for self serve clients.
Step by step guide:
- Name your ad
- Choose your ad duration 15, 30, or 60 seconds.
- Write your script.
- Instructions for voice actor. Here you can give specific instructions on tonality, how a word is pronounced, etc. and feel free to link out to other resources such as a Youtube video to help the voice actor get it perfectly right.
- Select the voice actor language. Presently we support a number of accents across English and Spanish.
English – African
English – Australia
English – Caribbean
English – Ireland
English – India
English – Malay
English – New Zealand
English – Philippines
English – Singapore
English – England
English – North America
English – South Africa
English – Chinese
English US (African American)
English US (Midland)
English US (Southern)
English – Canadian
English – Scotland
English – Latin American
English US (Caribbean)
Spanish – Argentina
Spanish – Chile
Spanish – Colombia
Spanish – Costa Rica
Spanish – Ecuador
Spanish – Castilian (from Spain)
Spanish – Mexico
Spanish – Panama
Spanish – Peru
Spanish – Puerto Rico
Spanish – Uruguay
Spanish – Venezuela
Spanish – Latin American Neutral
Male or Female
Teenage
Young Adult
Middle Age
Senior - You then select your genre of music and can preview it before submitting your order.
Single ad vs multiple ads vs sequence ads.
It is possible to run a single audio ad per campaign by uploading, using AI voices, or using a human voice actor campaign.
If you wish to run multiple audio ads in a campaign you can achieve this by uploading them. For example you could upload 4 ads. The impressions will be split evenly among them unless you choose automatic bidding in which case it will optimize towards the ad that has the greatest number of conversions over time.
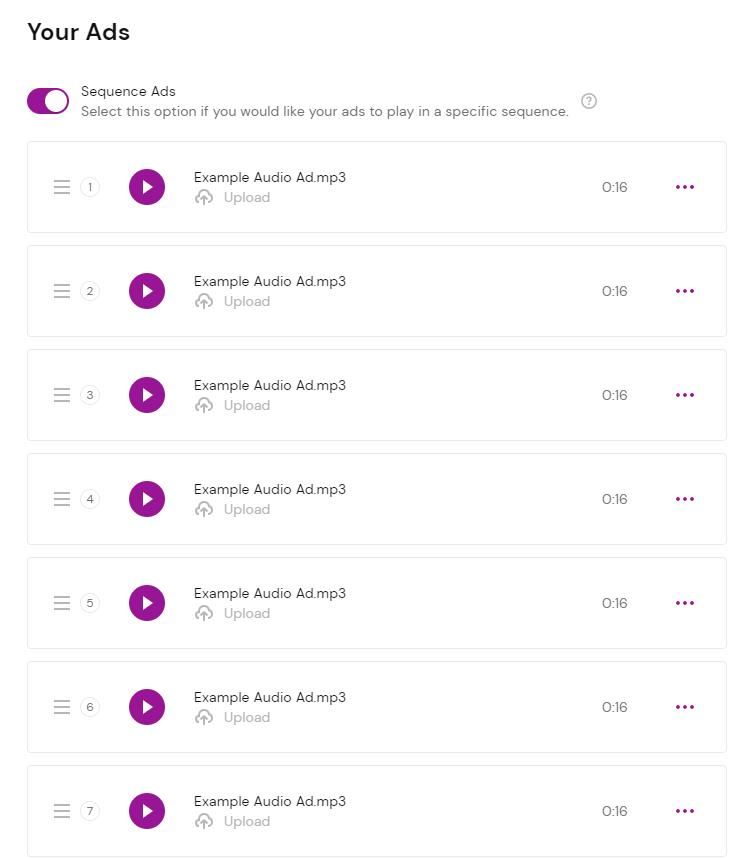
Additionally you have the option to “sequence” your ad. Conceptually you can think of it as a user hears “Ad A” then “Ad B” then “Ad C” in order. Presently, this option is only available for uploaded ads. Below is a screenshot of how it looks. You can drag and drop the ordering of the ads. The maximum recommended number of ads in a sequence shouldn’t exceed 8. Additionally it is possible to change the banner companion for each individual audio ad in the banner step.
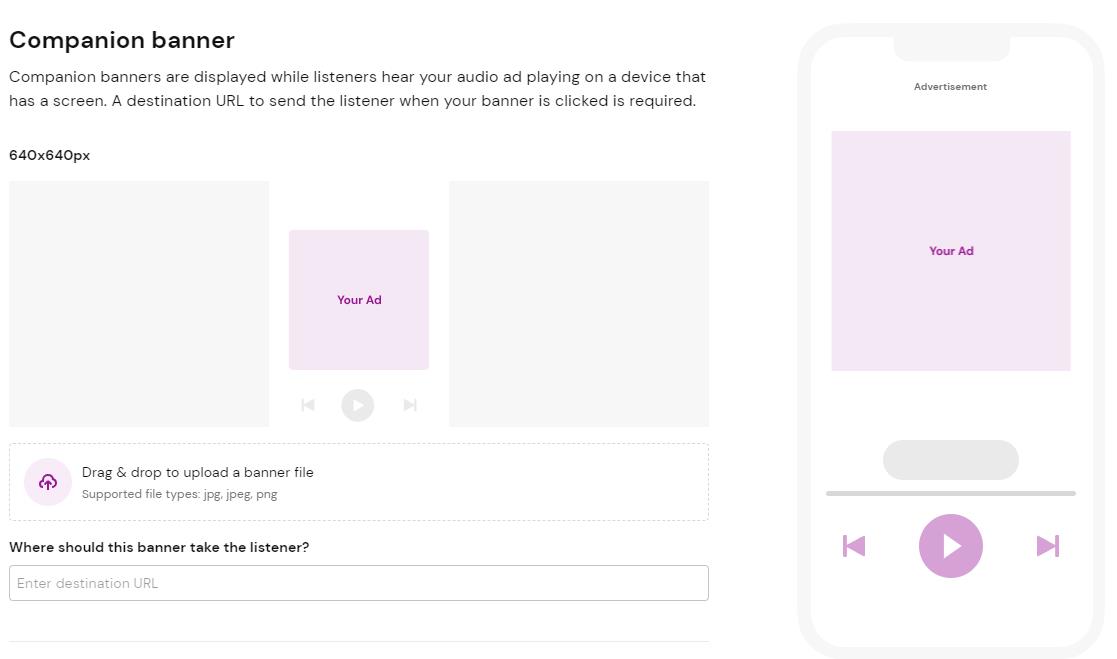
Step 4: Banners
All ads require a 640×640 companion banner. We then take this size and re-size it as necessary for individual publishers and their companion banner requirements. For the link we highly recommend utilizing UTM codes to better track your results. That said companion banners rarely are shown and get very few clicks as most users are listening with their phone screen off etc.
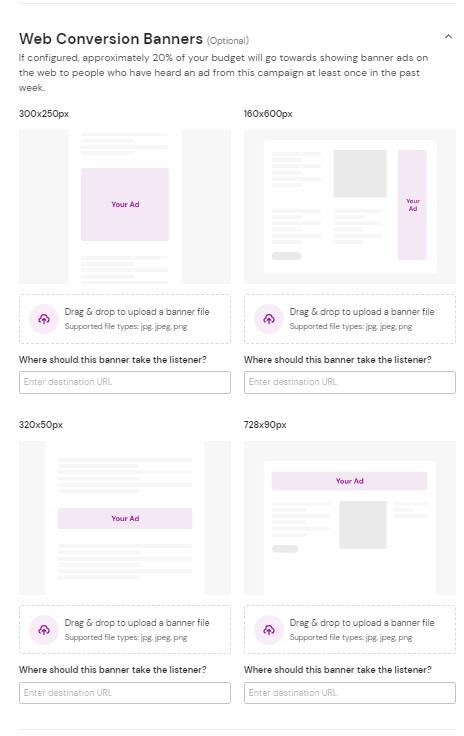
Additionally Decibel offers what we call our “Web Conversion Banners”. These are display retargeting banners that retarget the ad *listen* for the 72 hours after an ad listen on the same device that the ad was listened to on. We find this dramatically increases the clicks for campaigns. if you choose this option an automatic 20% of your budget is allocated to the web conversion banners.
The sizes of the web conversion banners are the following.
300×250
160×600
320×50
728×90

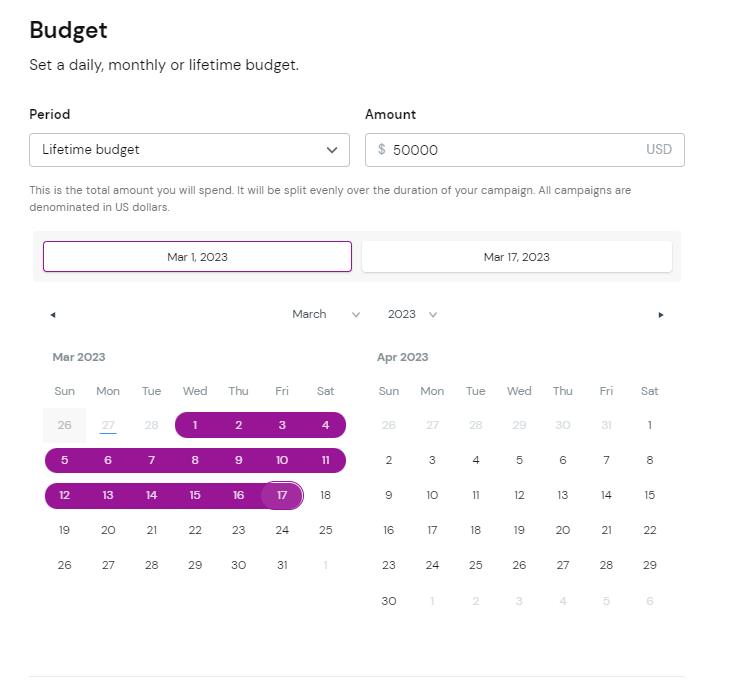
Step 5: Budget
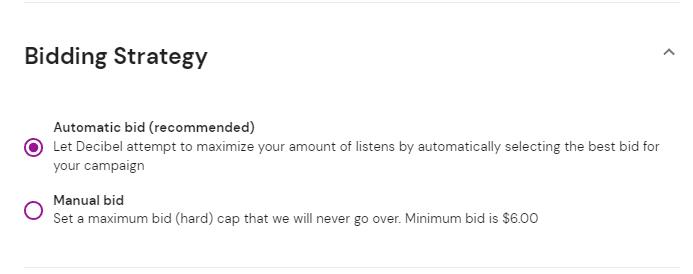
To set your budget you have 3 options.
- Lifetime budget. This runs with a fixed budget across a specific period of time. It will roughly spend the budget evenly every day but as the campaign optimizes some days may be more and some less in order to best hit your goals.
- Monthly budget. This is an ongoing budget that will spend the same amount of money every month. Similarly it will also spend roughly evenly on a daily basis but this can fluctuate based on your goals and optimization settings.
- Daily budget. This is an ongoing budget that will spend a specific amount every day.
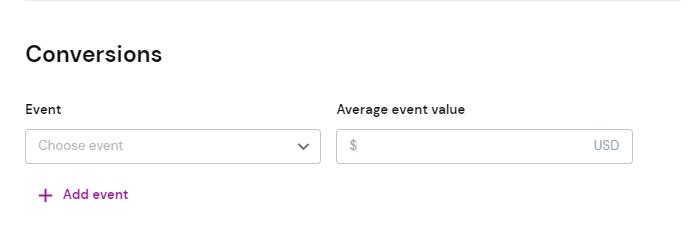
By default, Decibel creates a sitewide and checkout pixel. In this final section you can optionally set additional conversion events and assign them a value to better understand the outcomes of your campaign.
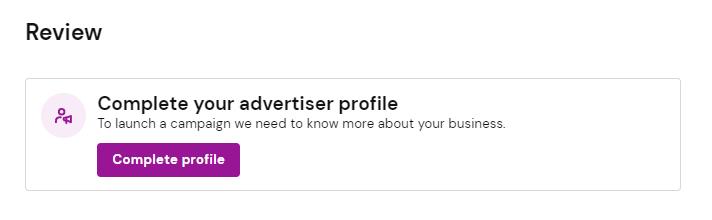
You did it! Just a few more steps and your campaign will go live. If this is your first campaign you need to create your “advertiser profile”. This helps us collect information that is important for our publishing partners to be able to approve your ads. A typical first campaign will take 24-48 hours to go live. Subsequent campaigns go live within 4 hours.
First click “Complete profile”
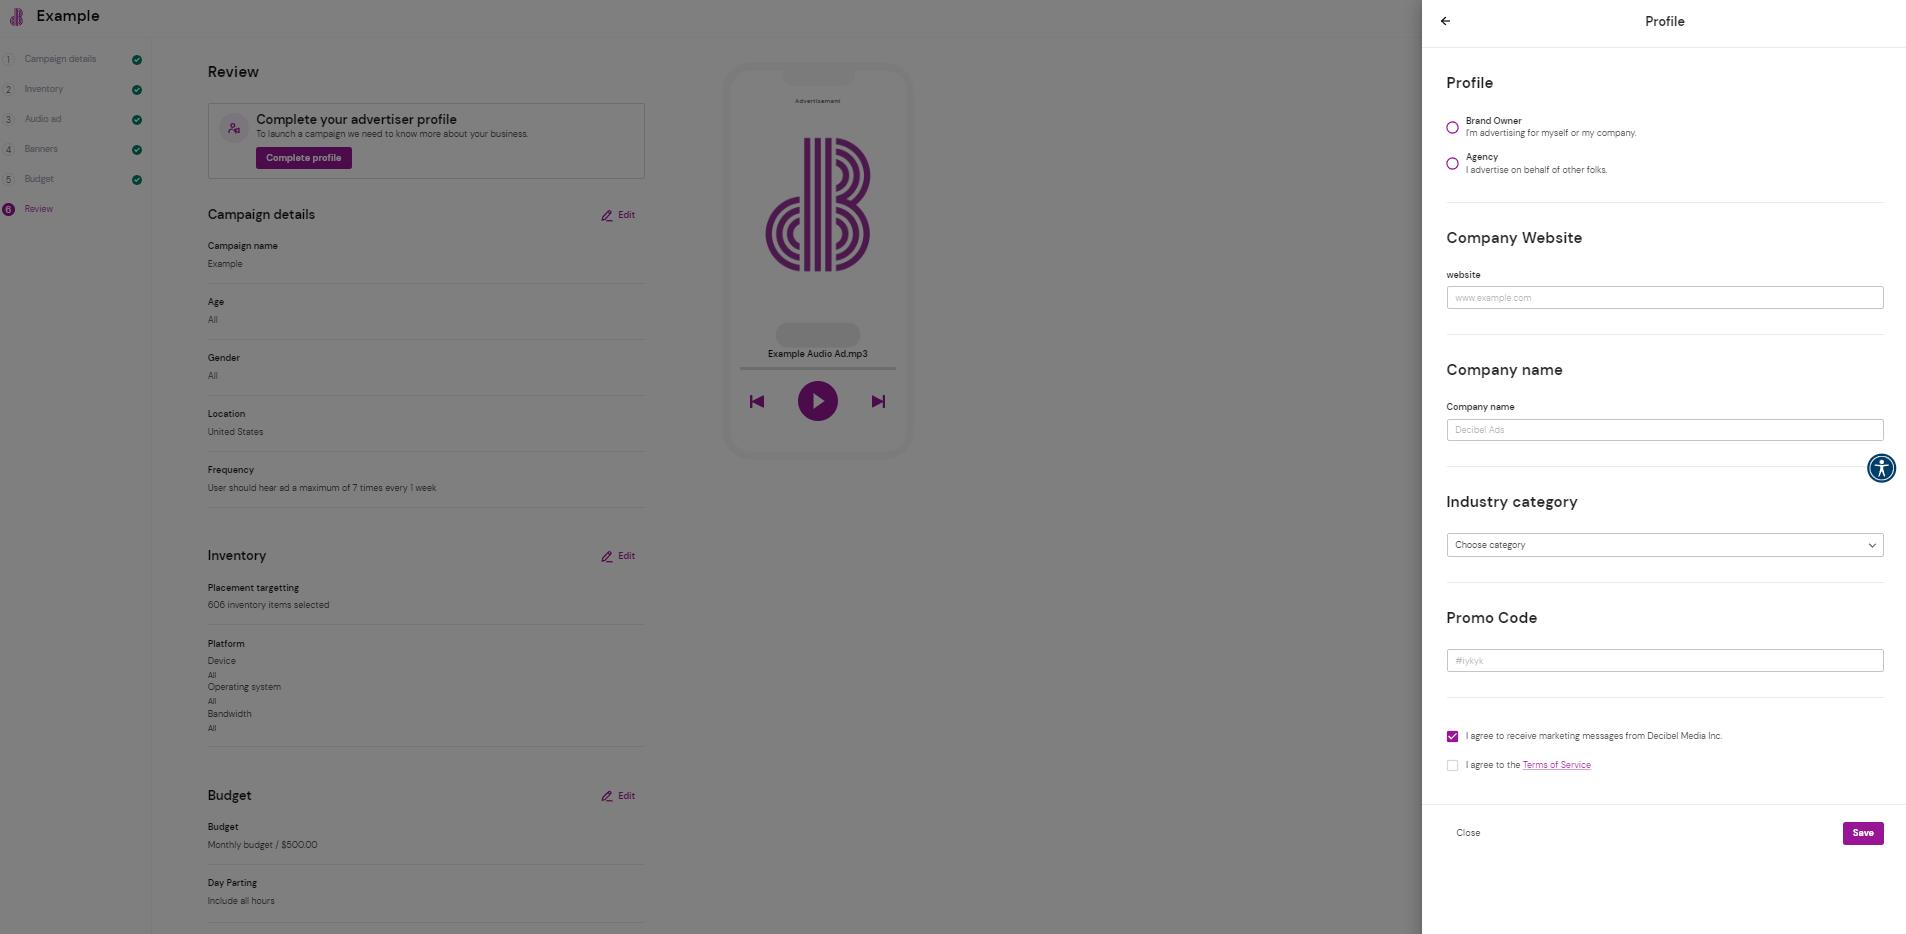
After that review your campaign fields and then click submit at the bottom of the page and you’re done! Congratulations on launching your digital audio ads campaign with Decibel.